Posts

Showing posts from April, 2020

Digital Accessibility: MS PowerPoint Introduction (1)

Image
PowerPoint presentations tend to be highly visual, and people who are blind or have low vision can understand them more easily if you create your slides with accessibility in mind. Here are the main areas that we must be addressed: When creating a new slide, use the built-in slide designs. This ensures that slide contents can be read in the order that you intend. Include alternative text with all visuals Add meaningful hyperlink text and ScreenTips. Ensure that color is not the only means of conveying information Use the Accessibility Checker to find slides that have possible problems When you first start making slides accessible, it may seem like it takes a long time to "fix" everything. It does gets easier with practice - but it gets really easy when you build each slide using one of the built-in templates and the preset layouts. Templates provide the themes and color variants for your presentation. You'll want to choose those carefully while considering
Digital Accessibility: MS Powerpoint Alt Text (2)

Image
Tip: To write a good alt text, make sure to convey the content and the purpose of the image in a concise and unambiguous manner. The alt text shouldn’t be longer than a short sentence or two—most of the time a few thoughtfully selected words will do. Do not repeat the surrounding textual content as alt text or use phrases referring to images, such as, "a graphic of" or "an image of." Add alt text to images PowerPoint does not automatically generate alt texts for drawn images, such as diagrams or icons. If you want to add an image that is an icon, screenshot, or other image that is not a photograph, you need to add the alt texts manually. Do one of the following: Option 1: Right-click an image and select Edit Alt Text Option 2: Select an image. Select Format > Alt Text The Alt Text pane opens on the right side of the slide. Type 1-2 sentences to describe the image and its context to someone who cannot see it. It is not necessary to say &q

Digital Accessibility - MS PowerPoint Links & Screen Tips (3)

Image
The following procedures describe how to make the hyperlinks, text, and tables in your PowerPoint presentations accessible. Add Hyperlink Text and ScreenTips Select the text to which you want to add the hyperlink, and then right-click. Select Link. The text you selected displays in the Text to display box. This is the hyperlink text. If necessary, change the hyperlink text. In the Address box, enter the description address for the hyperlink. Select the ScreenTip button and, in the ScreenTip text box, type a ScreenTip. Tip: If the title on the hyperlink's destination page gives an accurate summary of what’s on the page, use it for the hyperlink text. For example, this hyperlink text matches the title on the destination page: Templates and Themes for Office Online . You can Have some Fun with ScreenTips: Next Up: Digital Accessibility MS PowerPoint Color Contrast (4) > >

Digital Accessibility: MS PowerPoint Color Contrast (4)

Image
Make sure color is not your only method of conveying important information. In other words, do not use color alone to: convey meaning, make a distinction, make a comparison, or set something off or apart from the rest of the page.Use an accessible slide design Use one of the included accessible templates to make sure that your slide design, colors, contrast, and fonts are accessible for all audiences. They are also designed so that screen readers can more easily read the slide content. To find an accessible template, select File > New. In the Search for Online templates and themes text field, type accessible templates and press Enter. In the search results, select a suitable template. In the template preview window, select Create. High Contrast is best. The highest contrast and most easily visible for learners with or without color blindness is Black text on a white background. WebAIM has an online color checking tool. This web accessibility checker will detect a majori

Digital Accessibility: Saved as PDF

Image
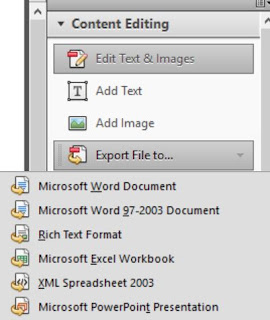
A more common type of PDF is one created in a different format and saved as a PDF. Perhaps you created a Microsoft Word handout and wanted to make it as available as possible to students. But to keep the formatting correct and not allow them to make any changes, you saved it as a PDF. The PDF is always less accessible than the original file. So, if you didn’t run the accessibility checker on your Word file and resolve any issues found then, the PDF will have those issues While PDFs are becoming easier to make accessible, the editing options are limited. My advice is that if you create the original file in another authoring tool (Word, PowerPoint, Etc) run accessibility checks in this tool and make your necessary changes there. It saves you quite a bit of work in Adobe Acrobat. that said, here's how to get the process started: Open the file in Acrobat Pro Click Tools Click Action Wizard Click Make Accessible After “making accessible,” Acrobat will want to run the ac

Digital Accessibility: Scanned PDFs

Image
Scanned PDFs are usually the least accessible PDF type. If you have these in the educational tools you share with learners it's time to  get rid of them. In terms of screen readers, this type of PDF is as good as holding up a photograph and asking the tool to interpret it.  Many of us have Adobe Acrobat Pro installed on our university computers. If this is the case, we can use built-in tools to convert (the majority of) the scanned document into text. This can be up to 85% accurate, depending on the quality of the scan. The following are instructions form the Adobe Acrobat Website: Open a PDF file containing a scanned image in Acrobat for Mac or PC. Click on the “Edit PDF” tool in the right pane. Acrobat automatically applies optical character recognition (OCR) to your document and converts it to a fully editable copy of your PDF. Click the text element you wish to edit and start typing. New text matches the look of the original fonts in your scanned image. Choose “File” &

MS Office Accessibility Checker

Image
Before sending your email message or sharing your document or spreadsheet, run the Accessibility Checker to make sure your Microsoft Office content is easy for people of all abilities to read and edit. Use the Accessibility Checker On the ribbon, select the  Review  tab. If you are using Outlook, note that you'll only see the  Review  tab  when writing or replying to messages. Select  Check Accessibility . Review your results. You'll see a list of errors, warnings, and tips with how-to-fix recommendations for each. See  Rules for the Accessibility Checker  for more information. Fix recommendations with ease To easily address accessibility errors and warnings, select an issue to open the  Recommended Actions  list. You can apply a one-click fix by selecting an action, or select the arrow button next to an action for more options.    Check accessibility while you work To be notified of accessibility issues in your document as you continue working on

Digital Accessibility: Screen Readers

Image
When creating more accessible documents, PDFs, and presentations for online distribution, we aim to make these accessible for all learners; including those who use screen readers. Have you ever experienced a screen reader? The Microsoft Immersive Reader is accessed using our webmail (Microsoft Outlook online email). It appears when you open a document that's attached in an email message (no available for PDFs). Works for OneNote, and other MS tools...it is also built-in to FlipGrid video discussion tool.